Posted by: pat 8 years, 11 months ago
I think this is Red Skeleton's fourth year. Last year I grew more and more dissatisfied with Red's performance and vowed to make some updates. My three goals were:
- Make the lip synch of the jaw movements more closely match the audio
- Replace moving parts in the electronics that might be contributing to instability
- Reduce the noise from the servo motor driving Red's jaw
This year I pulled Red into the workshop for a little refresh, which turned into a brain transplant.
Out With the Wave Shield, in with the Audio FX
In the past Red ran on an Arduino Duemilanove and an Adafruit Wave Shield. The Wave Shield is getting pretty long in the tooth. Frankly the only reason one would select it today is that the sd card gives you practically no limit on how much audio you can access. I noticed some flakiness in Red last year, especially on clear afternoons when the sunlight through the plexiglas panel at the front of Red's enclosure would turn it into a greenhouse. I never really liked the SD card and potentiometer volume dial on the Wave shield. I've had it get fussy about the SD card, and it can be staticy when adjusting the volume potentiometer. Right or wrong, I felt this was not a great solution for the harsh outdoor environment where Red makes his annual command performance. And there are better options now.
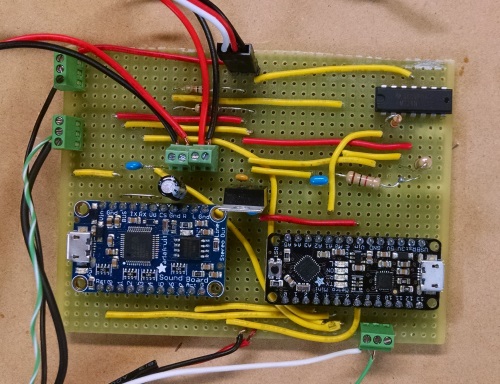
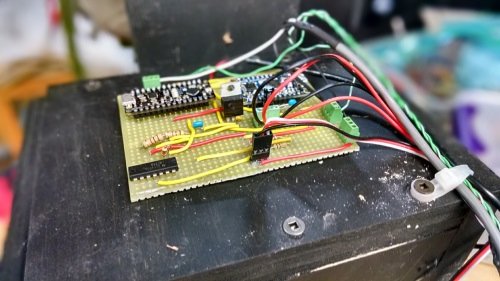
I ended up replacing the Arduino and Adafruit Wave Shield with an Adafruit Metro Mini and Audio FX board. The Metro Mini has a pretty anemic 5v supply so I wired up a 7805 to supply the servo, PIR sensor, and Audio FX board with power. I mounted and wired up the whole mess on a small piece of stripboard with terminals for the PIR sensor, LEDs in the eyes, and the servo.
Improved Audio Measurement
In the past I simply piped the audio + into an analog pin on the Arduino to detect loud vs. quiet bits in Red's speech and move the jaw accordingly. I've learned this is not a great solution. Audio is AC current that alternates + and - and only swings millivolts. The Arduino's analog input pins only read 0 to 5 volts DC. So not only was I clipping all of the negative values but I was also only basing my logic on very small swings of current. After learning all of this I also learned how to shunt the AC to ground to make the audio a DC signal, use a voltage divider to bias shift it up to be centered on + or - 2.5v rather than 0v (putting all values into the positive range), and amplify it with an operational amplifier so I can measure over a wider range. I also tweaked the reading of the analog pin to use a rolling average to smooth the spikes out.
In addition to these software and circuitry changes, I also got some threaded rod and itty bitty fittings for the servo horn that eliminate a lot of the slop I had in the linkage between the jaw and the servo.
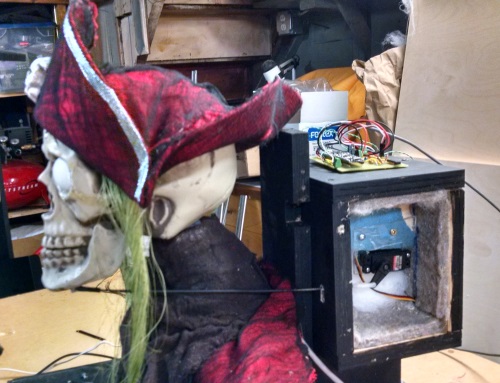
Silencing the Servo
The audible servo whine whine noise whenever it moved the jaw was annoying and distracting. It compromised the illusion that you are standing in front of an actual zombie skeleton buccaneer with a razor sharp wit.
I put the servo into a plywood box with all inner surfaces covered with 1/2" wool felt, and the space filled with poly batting. There is just one hole for the threaded rod that drives the jaw. Hopefully the servo doesn't combust in this enclosed space.
Conclusion
So far so good. I am very happy with the improved lip synch and silent servo. We'll see how the new brain holds up over the next few years. I've got a great idea for a new spider prop I'm planning for next year, in which I hope to add some EL wire lighting effects and go "bare metal" with just an AVR and no Arduino.
Current rating: 5 Share on Twitter Share on Facebook
Comments